
So you decided to purchase some doors for your new home or a replacement door on your existing home. Where do your start? Well as a door company we would tell you to start by getting to rough opening for each door, the door jamb size, and door swing before you even think about picking out the style of door. But let’s be honest 99% of homeowners start with picking out the door style and look they want for their home or build. So someone who know very little about doors before I was hired here a year ago, I am part of that 99%. In fact I still would pick out the style first and worry would the sizes later. Why? Because the look of the doors matters most to you and me, because it says something about your home, your style, and give it that “Yeah…this is my home” feeling.
So after you pick the style of door you want, what do you do next? You will need to know the following 3 things.
3 Things You Need to Know When Ordering a Door:
- Rough Opening Dimensions (WxH)
- Jamb or Stud width (W)
- Door Swing
- Left Hand Inswing
- Right Hand Inswing
- Left Hand Reverse (Right Hand Outswing)
- Right Hand Reverse (Left Hand Outswing)
__________________________________________________________________________________________________________
ROUGH OPENING (1 of 3)
(1)What is a Rough Opening (RO)?
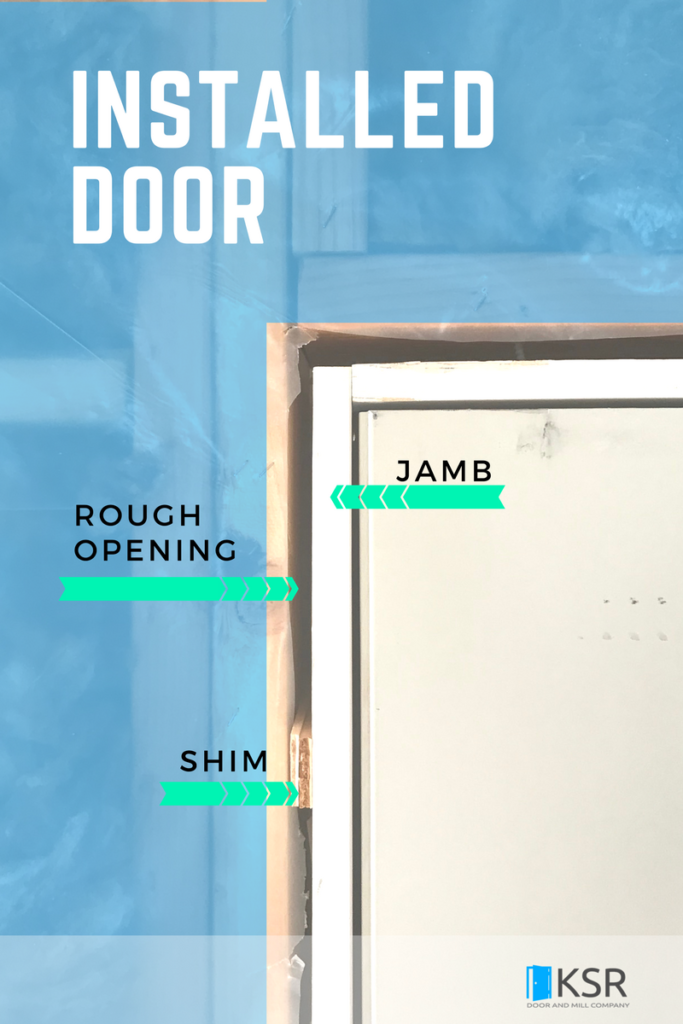
A rough opening refers to the framed opening of a door. A door has a jamb header across the top, a sill/threshold plate across the bottom, and vertical trim on either side. The door jamb takes up space, so for example, so a door that is 36 inches wide and 80 in tall is listed as 3/0 – 6/8, but the actual door and jamb measurements will be slightly more when you combine the door with the jamb. The difference between rough opening and actual door size will vary. We want to make sure that the RO is bigger than the door + jambs.
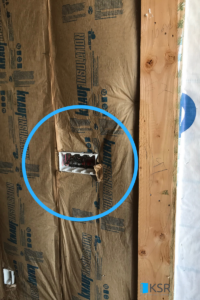
Here is a rough opening on a new build that we build the front doors for.

Front Entry Door Rough Opening New Construction
Why does the RO matter? You don’t what to order a door and have it be to big, to small, or you won’t be able to open or close it.
How to Measure A Rough Opening for a New Build and Replacement Door
Materials Needed:
- Measuring Tape
- Pencil
- Razor blade
- Pry bar
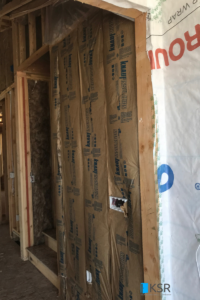
NEW CONSTRUCTION ROUGH OPENING
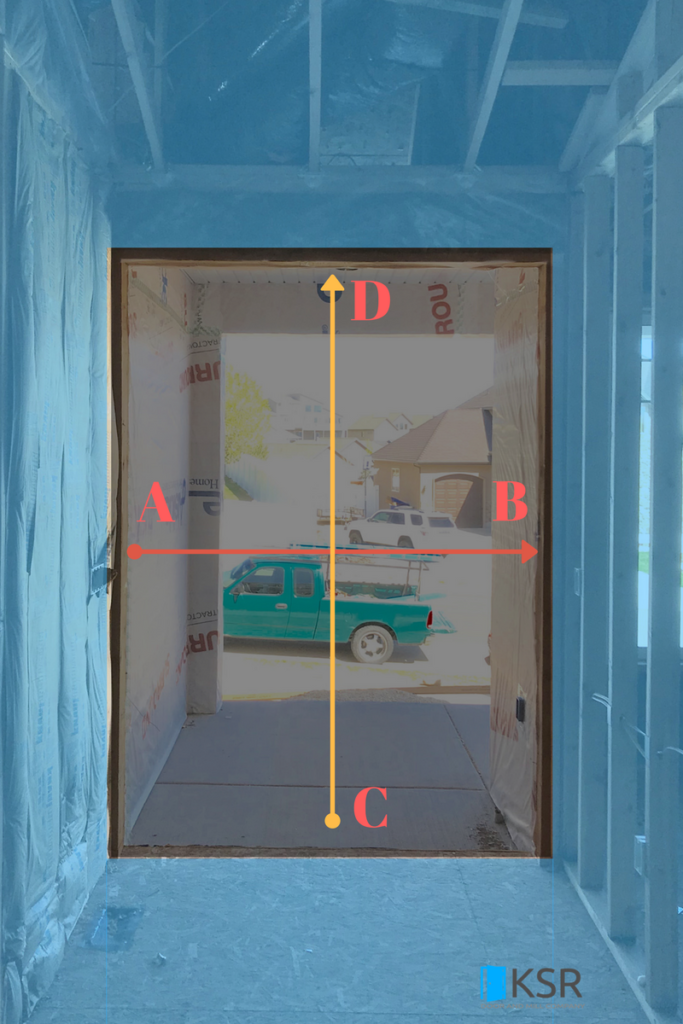
Front Door Rough Opening
Step 1 –
Measure the inside distance between one stud to the inside face of the other stud and write down the measurement
A / B Measurement (W) : ______________
Step 2 –
Measure the distance from the subfloor (plywood or concrete) to the inside face of the 2×4 or 2×6.
C / D Measurement (H) : _________________________________
RO Measurement: ____________ W x _____________ H
Repeat this process for every single doorway in your new home. Don’t assume that any of the doors have the same RO.
REMODEL OR REPLACEMENT
Step 1
To ensure the most accurate measurements, first remove the interior casing on the sides and top of door. (Video Below)
NOTE: As I’m typing this out I can hear my wife getting upset with me for removing the interior trim and making the entryway “look bad” for awhile. If, you have some hesitations about this just remember that very soon you’re going to be RIPPING OUT that ugly door and getting the Door of Your Dreams. It’s better to get an accurate measurement than to pay for and get a door that doesn’t fit.
Step 2 –
Measure the inside distance between one stud to the inside face of the other stud and write down the measurement
A / B Measurement (W) :____________
Step 3 – Measure the distance from the subfloor (plywood or concrete) to the inside face of the 2×4 or 2×6.
C / D Measurement (H) : _____________
Rough Measurement: __________ W x _________ H
NEXT STEP: JAMB/STUD WIDTH
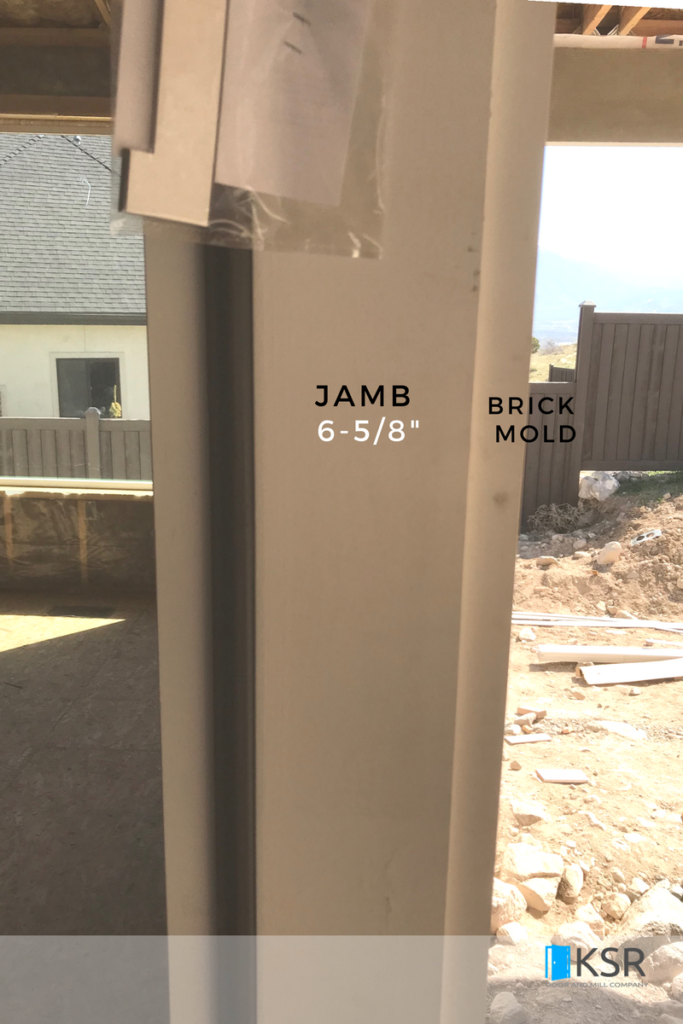
Jamb size (2 of 3)
Getting the right jambs size is also very important. You don’t want a jamb that is to big or to small. If it’s to big your exterior and interior trim wont fit and your installer will have to take your door apart and cut down your jambs. If the jamb is to small your installer will have to add more trim or get new jambs all together.
NEW CONSTRUCTION
Step 1: Measure the width of the stud within the RO or ask your contractor if he is just a 2×4 or a 2×6 stud for the entryway door frame
Stud Width : _________________
REMODEL OR REPLACEMENT
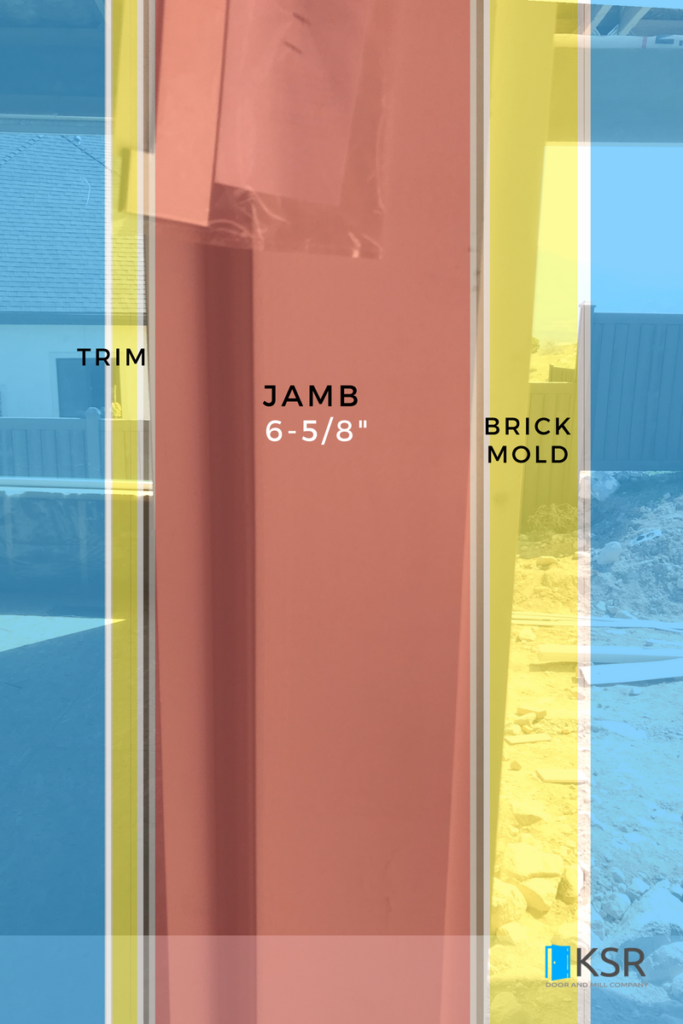
Step 1: Measure the distance between the interior trim and the exterior brick mold/trim.
Jamb Width : ________________
DOOR SWING (3 0f 3)
TYPES OF DOOR SWINGS:
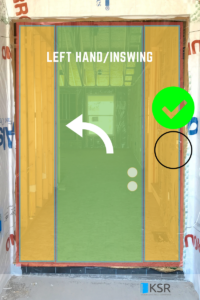
- Left Hand Inswing
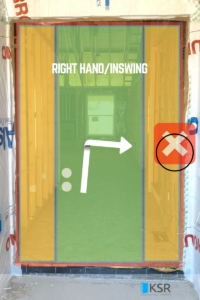
- Right Hand Inswing
- Left Hand Reverse (Right Hand Outswing)
- Right Hand Reverse (Left Hand Outswing)
Again, as someone who was new to door building a few years ago getting the right swing on a door was a little confusing at first. Mostly because I had to worried about putting the door in our beveling/hinging machine right the 1st time so I didn’t screw it up so I was always second guessing myself.. Once I learned a few things, and a cheaters way, getting the right door swing was easy,
1: The swing of a door is always seen as if you are going INTO a room or house.
2: Find the light switch: You want to make sure you know where the light switch is or where it is going to be.
WHY? You want to walk into the room and not have to close the door to get to the switch. See the example below a door we recently made and dropped off at a new construction. We made the door a Left hand / Inswing so that the owner could open the door into his house and reach over to turn on the lights. If we had make the door a Right Hand door he would of had to close the door to get to the light switches.
3: THE CHEATERS WAY: To Finding the Door Swing:
- Stand with your back against the jamb/stud of the door where you hindges will be so that you are facing the other door jamb/stud.
- Stick both arms out of you and point at the jamb/stud
- Swing one arm to act as if it was your door swinging into or outside of your home
- Did you use your:
- RIGHT ARM to swing INTO your home or room. …… RIGHT HAND INSWING
- LEFT ARM to swing INTO your home or room…… LEFT HAND INSWING
- RIGHT ARM to swing OUTSIDE your home or room ……. LEFT HAND REVERSE (Right Hand Outswing)
- LEFT ARM to swing OUTSIDE your home or room….. RIGHT HAND REVERSE (Left Hand Outswing)
- Did you use your:
SIDENOTE: OUTSWING – Right/Left Hand Reverse are called a reverse because the door swing is seen as if you were going INTO a room or home. So if you want your door to swing outside your home/room the hinges have to stick outside of the home/room. So if your RIGHT ARM swings to the OUTSIDE of your home, your taking the door you would use for a LEFT HAND INSWING flipping it around to make a LEFT HAND door but in REVERSE. It’s a little confusing but just use the chart above and you’ll do great.